
For you who haven’t read the part 1 of this post click here.
OK, in the previous post i had explained the server side configuration on how to setup the OpenVPN on CentOS. In this post I’ll try to explain on how to setup the client and test the VPN if it is working or not.
Lets get started then..
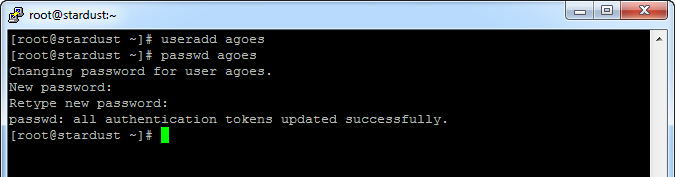
1. Make a new user for the vpn client.
useradd [username]
then give it a password. (note. password is always invisible when entered to the terminal)
passwd [username]
2. Next, we need to download the ca.crt file from the server. I’ll use WinSCP to download the file.
open your winscp and enter the needed credentials

the left window is our local files, and the right window is the server files. Point the right window to /etc/openvpn/easy-rsa/2.0/keys

simply drag and drop ca.crt files from the right window to the left window. and then click “Copy”

3. Next step, we have to make an .ovpn file containing.
client
dev tun
proto udp
remote [ip-server-vpn] 1194
resolv-retry infinite
nobind
tun-mtu 1500
tun-mtu-extra 32
mssfix 1450
persist-key
persist-tun
ca ca.crt
auth-user-pass
comp-lzo
reneg-sec 0
verb 3
save it with .ovpn extension.
[note. this file must be in the same folder with the ca.crt file downloaded from the server]

4. For the verification later. lets check our ip address. open up your internet browser and open ipchicken.

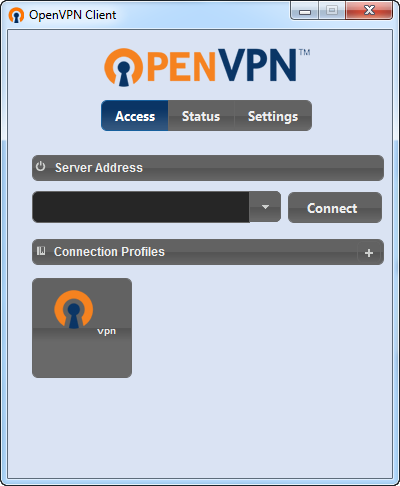
5. Open up your openVPN client software. I’ll use this client software to do it.

on the Connection Profiles, click the + button to add profiles.

select local files then point it to the ovpn file.

name the vpn and then click save

new profile has been created. Click it to start the connection
enter the login credentials with the username and password we had created on the server earlier then click login

if the configuration is successful now you should see this window


if not, check back again all the configuration you have done before.
6. Open up ipchicken again and see if our detected ip address has been changed.

and that is the basic openVPN setup and configuration.
i bought my vpn server from fosslink
credits to ageng-jr.com for this tutorial. 🙂
if you have any question feel free to contact me @ twitter, facebook, or send mail to mail@yudhiagus.com
“the quieter you become, the more you are able to hear..”